We like the idea of installing a gray water system, but we have lacked the plumbing smarts, financial resources, and home ownership (we have to run everything by the landlord) to make it a reality.
Now, however, due to a sewer backup, we are on our way to gray water bliss.
Let me explain.
A few weeks ago, while running a load of laundry in our hand-me-down water-inefficient washer, the toilets began making ominous gurgling noises, and sewage backed up into the shower. After calls to a plumber and the city, we thought the problem was fixed.
Last weekend, another load of laundry started the toilets gurgling and sucking all over again. Rather than tempt fate, Kelly stopped the load. But we really needed to finish the wash. And it was then, in a characteristic streak of brilliance, that Kelly landed on a solution that achieved both peaceful sewers and nearly 200 gallons of salvaged gray water (so far!).
I have to stop here and assure you that, as brilliant as she is, Kelly is no plumber. Neither does she have any special engineering or âhandy-manâ training. This is really really simple, and if youâre in our positionâhankering for gray water, while balking at the expense, trouble, etc.âyou should give it a try!
How to make a (temporary) washing machine gray water system in five minutes
Materials (highly variable and flexible depending on your needs and what you have laying around): Length of four-inch PVC pipe, two flexible rain gutter extenders, two 96-gallon plastic garbage containers (with lids), one five-gallon bucket, bricks/cement blocks/wood as needed.
1. Remove the âdrain hoseâ (i.e. the rubber hose that comes from the back of your washer) from where it disappears into a hole in your wall.

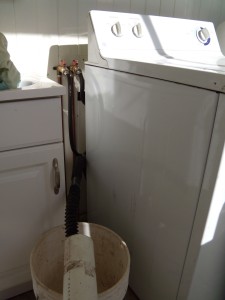
The black drain hose can be seen here extending over the rim of the bucket and inserting into the white PVC pipe.
2. Insert the drain hose into a length of pipe (ideally, a non-flexible pipe long enough to make it outside without further connections). We used a length of four-inch PVC pipe that measured about 7-8 feet long. We positioned a five-gallon bucket under the âconnectionâ between the pipes (drain hose jammed into PVC). This way, any leaks would go into the bucket rather than onto the floor (there were no leaks!!!).
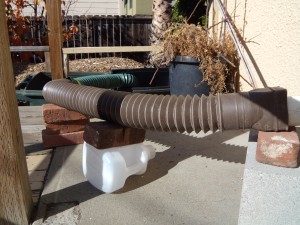
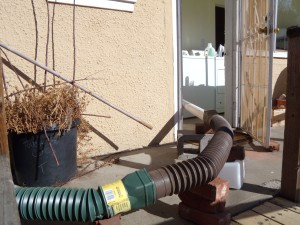
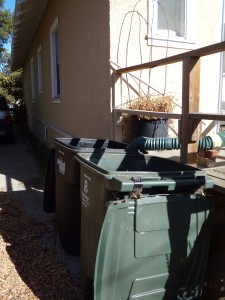
3. We attached two flexible rain gutter extenders to each other and connected them to the end of the PVC pipe to add necessary length and make some turns. We fed the end of the last flexible rain gutter extender into an empty garbage container.

The PVC pipe is on the far right-hand side of the picture. From there, the flexible rain gutter extenders complete the distance to the just-visible water receptacle off the edge of the porch. We may have an advantage in this regard, as our house is high off the ground.
4. We arranged stacks of cement blocks and bricks under different portions of the piping to ensure that all of the piping went downhill from the washer to the garbage container turned gray water receptacle.


