Category Archives: In the Garden

Carrot Greens, an Edible Love Story

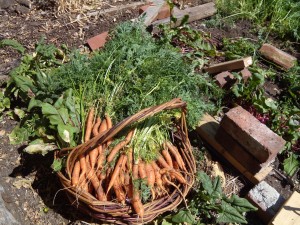
DSCN0115What’s not to love? The feathery leaves and carrot-y green smell make me weak in the knees, but I’ve never actually cooked with carrot greens.

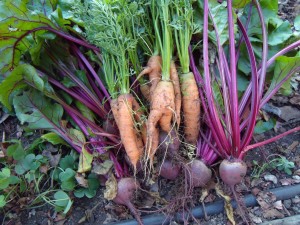
That all changed yesterday, when I harvested 11.75 lbs. of carrots and 5.75 lbs. of accompanying carrot tops. Our chickens disdain carrot greens and I found myself resisting the temptation to chuck the tops in the compost and get on with my day. Surely there must be a way to smuggle them into a recipe fit for human consumption? I poked around on the Internet and discovered that people all over the place love their carrot greens.

Carrot top pesto? Carrot green salads and slaws? Carrot green salsa? I have my work cut out for me in the kitchen.

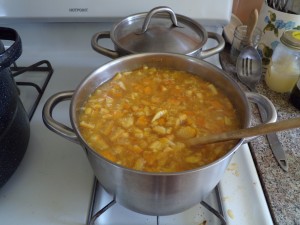
For starters, I made a batch of carrot soup. No recipe to go by, just a whole lot of carrots and other goodies from the garden. The soup has received rave reviews, so I’ll share the recipe I jotted down.

It has a rich flavor and a stick-to-your-bones feeling. Someone blind tasting it guessed that it had lentils in it—and it was hard to convince her that this soup is carrot through and through. I’m not sure how to say this, but it also tastes kind of fancy. As in, not something I threw together in my kitchen without a recipe. I take no credit; blame it all on the awesomeness that is carrot greens (and maybe also on the butter?!). Whatever it is, I’m sold on this soup.

Before we get to the recipe, a quick note on carrot greens. This is a widely misunderstood garden food, and people sometimes claim it is poisonous. Not true! I won’t go into the details here, but there is plenty of information out there debunking the poisonous carrot greens myths.

On the contrary, carrot greens are edible and also really good for you. They are high in many nutrients, including potassium, vitamin K, and magnesium.

Carrot Green Soup recipe

A caveat: I don’t believe in hard and fast recipes. I used what we had in the garden and kitchen and what seemed right. I hope you will too. And I hope you’ll leave a comment if you make an improvement on the recipe.

Ingredients

  • 3 tbsp. olive oil
  • 3.5 tbsp. unsalted butter
  • 3 small onions
  • 7 small garlic cloves, chopped small, or pressed
  • 1-2 cubes of bouillon (I used 2, but 1 probably would have been sufficient)
  • .25-.5 tsp. green coriander, chopped
  • 2 mint leaves, finely chopped (more mint might be even better)
  • 1.5 lbs. carrots, chopped small
  • 4 cups carrot tops, cut small
  • 1 cup beet greens, chopped
  • Juice from one Meyer lemon (big and juicy!)
  • 4 cups chicken stock
  • 2 tbsp. chives, finely chopped

Directions

  • Heat olive oil and butter in a large pot
  • Add onions and garlic, and cook over medium heat, stirring often
  • Add bouillon, green coriander, and mint to pot and stir until bouillon is broken down
  • When onions and garlic are cooked, add chopped carrots, and carrot and beet greens, stirring frequently
  • Add chicken stock and lemon juice
  • Simmer until carrots are well cooked
  • Let cool, then blend batches in the blender
  • Garnish with chopped chives and mint leaves
  • Enjoy!

April Garden Harvest

April harvest totals
  • Asparagus ‘Farmer’s Favorite’: .25 lbs
  • Beet ‘Pacemaker III Hybrid’: 1.13 lbs
  • Carrot ‘Nantes’: .63 lbs
  • Cauliflower ‘Snow Crown’: 1.5 lbs
  • Chives: .09 lbs
  • Cilantro: .28 lbs
  • Eggs: 32 (Barred Rock 17; Barred Leghorn 15)
  • Fava bean ‘Superaguadulce Morocco’: 2.89 lbs
  • Fennel ‘Perfection’: 3.5 lbs
  • Lime ‘Bearrs’: 2.13 lbs
  • Mulberry ‘Pakistan Fruiting’: .5 lbs
  • Navel orange: 2.63 lbs
  • Onion ‘Red Amposta’: .38 lbs
  • Onion ‘Yellow Granex’: 1.5 lbs
  • Orange mint: 1/32 lbs
  • Parsley ‘Dark Green Italian Plain’: .03 lbs
  • Snap pea ‘Sugar Snap’: 1.25 lbs
  • Snow pea ‘’Oregon Sugar Pod II’: .125 lbs
  • Spinach ‘Donkey’: 2.31 lbs
  • Spring onion: ‘Purplette’: 3.56 lbs
  • Strawberry ‘Albion’ and ‘Seascape’: 1.25 lbs
  • Sweet Marjoram: 1 sprig
  • Tarragon: 1 sprig

Harvest total: 25.97 lbs

2014 harvest total: 226.98 lbs

Birth and Death

Death

Earlier this week the city cut down an old Valley oak in our neighborhood. It’s a tree I walked past as a child and one that I have always loved. Turns out it was well over 350 years old. I know, of course, that there are plenty of species that live far longer than this, but somehow I can’t get over the fact that a tree in the place I call home grew up in the 1600s, that it shaped this landscape even as the land around it went from open oak savannah to suburban lawns and asphalt.

Lawns and asphalt, incidentally, are probably what compromised its health to the point that, even with all its vibrant spring growth, the city felt the need to limit liability and cut it down.

Kelly and I sat on the curb under its leaning trunk and talked to it in our hearts the night before it died. We went back the next afternoon and touched the great, oozing rounds of it that the city left behind. And we pulled out soft white sponges of oak root fungus (Armillaria mellea) from the tree’s core and smelled the yeasty sweetness.

We are lucky. There are probably dozens of giant old Valley oaks in our immediate neighborhood. They are stunning and majestic, and they are holy to me. Most of them are planted in the middle of irrigated lawns, or crowded next to sidewalks and driveways. There aren’t many young trees, at least not ones that will have space to grow.

I have watched the Valley oaks slowly going over the course of my small human life, taken out by the city or falling on their own. It has always nagged at me that there is no longer space in this suburban landscape for Valley oaks to thrive and reproduce.

But there’s something about losing the tree this week that has lit a fire in me and broken my heart, all at once. Maybe I will nag the city to start replanting trees from local stock. Maybe I’ll go door to door imploring neighbors to stop irrigating lawns at the bases of these drought resistant trees, to take out paving, to make space.

Death

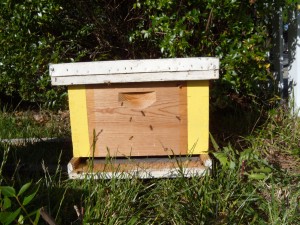
The second death this week is also heartbreaking. Kelly and I went outside today and noticed that no bees were flying into Mondo, our beloved three-year-old top-bar hive. We got underneath and looked up through the screened bottom with a headlamp. There were a handful of zippy, agitated bees, but no group in sight, no rumbling hum of a healthy hive.

As usual, Mondo built up beautifully this spring. They swarmed at least once last month. All we can figure is that their new virgin queen got lost on her mating flight.

Of course, we could always be wrong. Perhaps they swarmed a few more times when we weren’t looking and are still waiting for the new queen to get up and running. But it doesn’t look good, and we’re fairly certain they’re gone.

We have other great bees, but Mondo’s line was our favorite and our longest-lived survivors. To make matters worse, Juniper, Mondo’s first swarm from last year, is our only other hive from this lineage, and she isn’t looking great. Although she built up well coming out of winter, we’re not aware of Juniper swarming yet, and she seemed to slow way down in March. There is a pile of dead bees in front of Juniper that we think have deformed wing virus.

Birth

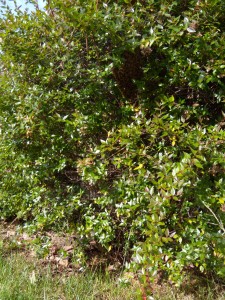
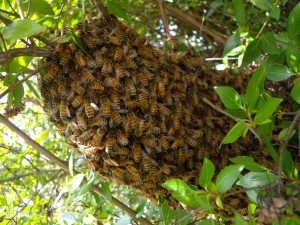
About an hour after discovering Mondo’s troubles, we got a call from some friends who live just two blocks away. They reported that there was a swarm in their front yard, and asked if we wanted it. We jogged over in our bee suits, and there it was: a beautiful, mellow, good-sized swarm about three feet off the ground in a shrub.

This never happens to us.

We are used to swarms high up in trees on perilous branches. We’re used to swarms with eight queens and thousands of worker bees that can’t figure out where their allegiance lies. We’re certainly not used to swarms that march docilely into a box that you place just below them.

Even Kelly, who has sworn off beekeeping with all of its stresses and unpredictability, was excited about this swarm. We wondered whether there’s a little bit of Mondo’s genetics in these bees, or if they came from the cavity in the old Valley oak that stands next to the one that was cut down. We wondered if they are exactly what our hearts need.

DSCN0028

DSCN0029

DSCN0033

Little Free Library and Seed Exchange Launch

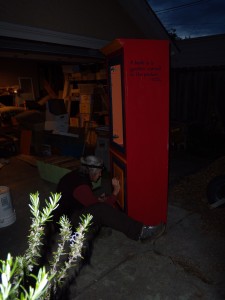
Kelly pulls an all-nighter with her headlamp to finish the text on the library.

Kelly pulls an all-nighter with her headlamp to finish the text on the library.

The perfect proverb for a library/seed exchange.

The perfect proverb for a library/seed exchange.

Kelly applies her artistic talents

Kelly applies her artistic talents

DSCN0065

The helpful father.

Books on top and seeds below!

Books on top and seeds below!

DSCN0071

The library launch: 16 children's books, 28 books for adults.

The library launch: 16 children’s books, 28 books for adults.

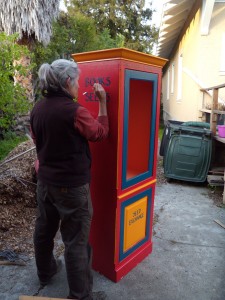
We finally finished the months-long intensive paint job on our little free library and seed exchange and installed it this evening. Yay!!!!

Now, to spy through the front windows and see who stops to look at books!


March Garden Harvest

If only orange season lasted longer. The tree is bare, save for a last few remaining oranges.  We feasted on orange juice for the first half of March and sipped sparingly in the second half. Spinach parsley pesto was a huge hit this month, and I made three batches. The loquats are in full swing, but we have yet to get our loquat liqueur started. The chickens’ egg production picked up, while the asparagus yield remained disappointingly low.
Onward to more carrots, beets, and peas in April. We also have a second round of cabbage, cauliflower, and broccoli in the ground.
March harvest totals
  • Asparagus ‘Farmer’s Favorite’: 1.69 lbs
  • Beets ‘Pacemaker III Hybrid’: 3.25 lbs
  • Broccoli ‘Rudolph’: .5 lbs
  • Broccoli ‘Umpqua’: .25 lbs
  • Cabbage ‘Copenhagen’: 4 lbs
  • Cabbage ‘Parel’: 2.5 lbs
  • Carrot ‘Nantes’: 2.13 lbs
  • Cauliflower ‘Snow Crown’: 1.5 lbs
  • Chard ‘Fordham Hook’: 2 lbs
  • Chard ‘Rainbow’: 2.5 lbs
  • Chives: .06 lbs
  • Cilantro: .5 lbs
  • Dinosaur Kale ‘Niro di Toscano’: .31 lbs
  • Eggs: 42 (Barred Rock 24; Barred Leghorn 18)
  • Fava bean ‘Superaguadulce Morocco’: 4 lbs
  • Fennel ‘Perfection’: 3.13 lbs
  • Kale ‘Winterbor’: 1.75 lbs
  • Kale ‘Wild Kale Blend’: .75 lbs
  • Lettuce ‘Heirloom Blend’: .88 lbs
  • Lime ‘Bearrs’: 5.75 lbs
  • Loquat: 5.75 lbs
  • Mustard ‘Ruby Streaks’: .06 lbs
  • Navel oranges: 48.88 lbs
  • Parsley ‘Dark Green Italian Plain’: 1.16 lbs
  • Spinach ‘Donkey’: 2.28 lbs
  • Snow pea ‘Oregon Sugar Pod II’: 4.88 lbs
  • Snap pea  ‘Sugar Snap’: 3.5 lbs
  • Spring onion ‘Purplette’: 3.25 lbs
  • Thyme: 1 sprig
  • White sage: 1.5 lbs

March harvest total: 108.71

2014 harvest total: 201.01 lbs

DSCN0022

What Do You Need to Make a Walk Away Split?

There are lots of approaches to dividing honey bee colonies. Our favorite is walk away splits. This method is cheaper and less complicated than purchasing or raising a queen to introduce. But the real reason we believe in walk away splits is that the bees get to select and raise their own queen.

In all aspects of our beekeeping, we attempt to meddle as little as possible in the life of the colonies, and we endeavor to cultivate locally adapted bees that are better at taking care of themselves without treatment or other human support/interference.

Walk away splits are simple (in theory) and give the bees a break in the reproductive cycle, and thus also a break from varroa mites.

The beekeeper’s only role in a walk away split is to transfer frames from the original hive into new boxes. The bees do the rest of the work. The key to this type of hive division is timing and ‘ingredients.’ In the ten minutes it takes the beekeeper to transfer frames from a strong hive into a new box, she must choose frames that contain key components and arrange them in such a way as to make it easier, not harder, for the new colony to raise a strong queen.

So what do bees need to raise a good queen?

 Eggs

Bees need eggs from which to raise a queen. The difference between a worker bee and a queen bee is a matter of nutritional variation early in development. All young larvae are fed royal jelly, but worker bee larvae are fed less royal jelly for a shorter period of time than larvae being raised for queens. It is safest to select frames containing eggs for the bees to rear a queen, rather than try to gauge the age of the larvae you see (since very young larvae can also be raised into queens with the right nutrition). By making sure the frames you choose for the split contain eggs, you guarantee that the bees will be able to select larvae of the correct age from which to raise queens.

Phew—what a mouthful!

A new split doesn’t need very many eggs for the bees to raise a queen. In fact, avoid including frames with lots of eggs or open brood, as this will force the bees to feed and care for many babies. Ideally, they should put most of their energy into caring for the developing queen or queens they are raising.

One frame of capped brood with a small patch of eggs is perfect for a walk away split.

Nectar

Excellent nutrition is critical to the survival of a young split.  Because most of the bees on frames of brood are young nurse bees, the new split will not have a strong group of foragers for some time, and it’s important that there is food in the split for the bees to survive on in the beginning. Nectar is an important nutritional component, so make sure it is plentiful in the split. Although honey works too, I have heard that including frames with curing nectar is even better where raising baby bees is concerned.

Two or three frames containing a combination of nectar and pollen should be sufficient for a walk away split. These important frames of food should be placed facing the frame with eggs, so that food sources for the young queen and her attendants are close at hand.

Pollen

Pollen contributes protein to a bee’s diet. Again, nutrition is key. If it’s possible to find frames with both nectar and pollen together, this is best.

Capped brood

Think of capped brood as future workers. Capped brood doesn’t need to be fed and tended to like bees in the larval (uncapped) stage of development. Capped brood is less labor and resource intensive for the nurse bees in the new colony. At the same time, it ensures that there will be an influx of young bees to the colony’s workforce within 13 days.

One or two frames of capped brood should be sufficient for a walk away split. All the brood should be together in the middle of the box. More capped brood can be added to make a stronger split.

Nurse bees

Hive divisions need lots of nurse bees. Again, the developing queen should have all the attention and care she requires, and the capped brood must be kept warm. Nurse bees are also more likely to stay in the new hive, rather than returning to the mother colony (which is often only a few feet away). No matter how many older foragers you add to a new split, they will find their way back to the original hive if it is close by. This is because, unlike nurse bees, foragers have already gone out into the world and oriented to the original hive’s location.

Select nurse bees by adding frames of capped brood (and a few eggs!) that are covered in bees. The bees in the brood nest should primarily be nurse bees. Because they are younger than foragers, nurse bees tend to be smaller.

Honey

We generally prefer not to supply our bees with sugar syrup feed, though this is often recommended for new splits. Instead, you can include an extra frame of honey to feed the bees until nurse bees have graduated to foragers.

How many frames to include in a split

We generally aim for at least five frames total in a walk away split (including a few frames of brood, and a few of pollen, nectar, and honey). We aim to include enough bees to cover these frames, keeping in mind that bees on frames of food stores may not be nurse bees and will probably return to the original colony.

If you want to add additional nurse bees, you can remove extra frames of brood from the mother hive and shake the attending bees into the new split. You can also always add extra frames of capped brood (covered in bees) to bolster the split’s population down the line.

Check out this post on how to tell when a hive is ready to split, or read about our first hive division last year, and splitting a hive the same day that it swarmed last spring.

Gauging Honey Bee Colony Readiness for Walk Away Splits

What makes a hive ready to divide, and how can you, the beekeeper, tell? Here’s what I go by when deciding if one of our hives is ready to split and ready to raise its own queen. And, if any of the beekeeping jargon below has your head spinning, take a look at our illustrated glossary of beekeeping.

Population

Is the hive ‘booming’? I look for bustle at the hive entrance, including bees orienting, bees arriving at the entrance with pollen, and a generally busy, productive vibe. Removing the outer cover, I look to see if there are bees visible (teeming, even) at the inner cover’s opening. I check out how the bees’ population seems within the hive. Are the frames covered in bees? Are the boxes full?

A good strong population in and of its self doesn’t mean the hive is ready to divide, but strong numbers are a must for making a walk away split. After a divide, both the mother colony and the new split(s) need to have plenty of bees to rebuild and raise a queen.

Nectar flow

If there’s lots of new, pearly white wax in the hive and bees tending to curing honey, there is a nectar flow in progress. This bodes well for hive divisions, as it means food is plentiful. Proper nutrition is essential for the bees to be able to raise a strong new queen.

Of course, it’s entirely possible to have a nectar flow on and a hive that’s not at all ready to divide. But I would hesitate to divide a colony if I don’t see signs that the bees are finding good forage and that they are currently supplied with stores to raise a queen.

Drones

The presence of drones and drone brood within the hive generally indicates that the colony is in its reproductive phase. An exception to this is hives in which there is a drone-laying worker (this can happen when the colony lacks a queen and a worker bee begins laying unfertilized eggs). In this case, all of the brood will be drone brood—not a good sign.

In spring, in a healthy colony, the queen will begin laying some drone brood before the hive swarms. If it’s spring, and you find drones milling about in the hive and patches of drone brood on the frames, the colony is in the process of reproduction.

Capped brood

Look for a ratio of about 90% capped brood to 10% uncapped brood in the hive. This is a sign that it is definitely time to divide the hive.

Before the colony makes its final preparations for swarming, the queen’s egg production slows. The bees are actually putting her on a diet to lose weight so that she will be able to fly with the swarm when it leaves the hive. Another benefit to the slowed egg production is that capped brood is less work for the remaining bees after a swarm to care for. Since the colony remaining in the hive after a swarm has its population cut by about half, the bees can put their energy into raising a strong new queen—not feeding uncapped worker bee brood.

Queen cells

This can be an obvious sign that the colony is reproducing and will soon, or has already, swarmed. It’s also possible the colony is in the process of replacing a failing or dead queen, rather than at the height of its reproductive vigor.

If you see queen cells, check out the above indicators to confirm preparation for swarming. Also note where the queen cells are positioned on the frame. Cells along the bottom edge of the comb are more likely swarm cells, while queen cells scattered in the middle of frames are often supersedure, or queen replacement cells.

It’s also worth looking to see if you can find eggs in the hive when you see queen cells. If eggs are present (and the brood isn’t all drone) you know that the queen has been in the hive within the last three days.

Also note what stage of development the queen cell is in and how much attention the bees are paying to it. If the bees aren’t milling around over the cell and looking like they have important business to attend to, it’s likely the queen isn’t viable, or that this is an old, un-hatched queen cell. If the bees are attending to it, you should too.

The presence of viable capped swarm cells is a definitive sign that the hive has already swarmed, or that it is about to.

Case study

I inspected one of our strongest hives on March 8th.  This is a colony that is seriously booming. The bees overwintered with four deep bee boxes, and we added a fifth in late February. That fifth box was teeming with bees on March 8th and was full of brood, capped honey, pollen, and nectar.

Mid-inspection, before adding the sixth box on March 8th.

The hive last year with a honey super on top. My camera ate my recent inspection photos.

I had come prepared to divide the hive, based on its huge population. I worked my way halfway through the fifth box and considered my Is the colony ready to split? mental checklist.

Population, check. Nectar flow, check. Drones, half-check (I saw a handful of drones, as well as a handful of drone brood cells, capped and uncapped). Capped brood, no check. There was certainly capped brood, but it was nowhere near 90% of the brood I saw. I also didn’t see any queen cells.

For the record, I actually prefer to split before the bees start raising a queen. Handling frames with capped queen cells entails a risk of damaging the queen. Also, once there are queen cells, it may be too late to prevent swarming, as the first swarm may have already left with a large portion of the colony’s population.

Based on the capped brood ratio, I decided the colony wasn’t quite ready, but I thought they were close. Because of the nectar flow and the prodigiously laying queen, I added a sixth box for the colony to move into and resolved to return in a week for another inspection.

It’s amazing how different a hive can look from one week to the next when it is ramping up in spring. I ended up splitting the hive today, and am second-guessing some of my decisions, but I’ll save all that for my next post.

Homemade Honey Orange Marmalade

When we began harvesting navel oranges in earnest last month, I canned orange marmalade for the first time. The recipe is from our third edition copy of Stocking Up (1986), by Carol Hupping and the staff of the Rodale Food Center.

I was drawn to this recipe for its simplicity. Of the four ingredients, only the water wasn’t ‘local’ (i.e. from our own garden). The book calls it Bitter Orange Marmalade, and it is indeed quite bitter due to the inclusion of all of the fruit peel in the recipe. Maybe next year I’ll try a more traditional, sugary marmalade recipe, but overall I’m pleased with this one.

As I’ve mentioned before, I always hesitate somewhat to share recipes for canned goods. Please proceed at your own risk, and read up on canning safety at the website for the National Center for Home Food Preservation. The USDA offers a Complete Guide to Home Canning there. You can read about botulism on the CDC website. If you don’t feel comfortable canning, or have safety concerns, you can always make recipes to freeze or store short-term in the refrigerator.

Marmalade ingredients

  • 5 oranges
  • 2 lemons (I used Bearrs limes)
  • 3 cups honey
  • 12 cups water

Directions

  • Measure water into a large pot and add whole oranges and lemons or limes
  • Bring to a boil, then reduce to a simmer and cook for two hours
  • Saving remaining water, remove fruit, quarter it, and remove seeds
  • Chop fruit and return it to water
  • Bring fruit mixtures to a boil and add honey
  • Return mixture to a rolling boil and stir constantly for 15-30 minutes, or until the mixture has the consistency of a thick syrup (I had to stir and boil for about 45 minutes)
  • Leaving ¼ inch head space, pour marmalade into scalded half-pint jars and process for 10 minutes in a boiling water bath
  • Let the marmalade ‘age’ for at least two weeks before digging in

Enjoy! After dutifully waiting the recommended two weeks, we popped a jar open and started snarfing. I’ve been eating orange lime marmalade by the spoonful!

Yum!

Yum!

February Garden Harvest

We kept up our garden record keeping, but slacked off somewhat on our harvesting in February. It was a month of  orange wedges, orange juice, and canning orange marmalade. We neglected our greens, and the garden is overrun with spinach, lettuce, broccoli, mustard, and kale. Peas, beets, carrots, fennel, and asparagus are on their way in for March!

February harvest totals

  • Asparagus ‘Farmer’s Favorite’: .25 lbs
  • Broccoli ‘Rudolph’: 1 lb
  • Broccoli ‘Umpqua’: .56 lbs
  • Cauliflower ‘Snow Crown’: 5.63 lbs
  • Chard ‘Fordham Hook’: 1.25 lbs
  • Chard ‘Rainbow’: .63 lbs
  • Cilantro: .72 lbs
  • Eggs: 27 (Barred Rock 14; Barred Leghorn 13)
  • Kale ‘Dinosaur’: .38 lbs
  • Kale ‘Wild Kale Blend’: 1.13 lbs
  • Leek ‘King Lear’: 1 lb.
  • Lettuce ‘Heirloom Blend’: 1 lb
  • Limes ‘Bearrs’: 5.5 lbs
  • Mustard ‘Ruby Streaks’: .25 lbs
  • Mustard ‘Tah Tsoi’: .125 lbs
  • Navel oranges: 45 lbs
  • Parsley: .19 lbs
  • Spinach ‘Donkey’: .63 lbs
  • Spring onion ‘Purplette’: .88 lbs

February harvest total: 66.13 lbs

2014 harvest total: 92.3 lbs

We've begun letting some of the brassicas go to flower, and the bees are loving it.

We’ve begun letting some of the brassicas go to flower, and the bees are loving it.

Lacto-Fermented Cauliflower Pickles

If you’re just after the pickle recipe, scroll on down…

We are crazy about pickles, and every summer I can quarts of fresh-pack cucumber dill pickles. The fun of fresh-pack pickles, is that there’s no waiting around while they brine and no worrying about weird bacteria cropping up during the brining process. You chop up your ingredients, boil the brine, and can the goods all in one exhausting evening.

Last week, though, I tried something new.

It started with scads of cauliflower in the garden. Then Kelly and I made a trip to a magical place called Mountain Feed and Farm Supply, in Ben Lomond. It left my head spinning with all its nifty gadgets, and I brought home my very own ‘Perfect Pickler’ and wild ideas about probiotic cauliflower pickles.

Lacto fermenting pickles is different from fresh packing, but as it turns out, it’s not really harder to do, and it yields much greater benefits nutritionally. The Perfect Pickler’s trick is the airlock that fits into the lid of the jar; while your vegetables froth away, growing what are apparently millions of good bacteria as they lacto ferment (i.e. pickle), no outside air or ‘bad’ bacteria can get into the jar to taint your recipe.

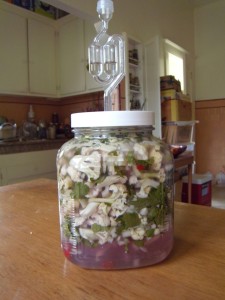
Cauliflower pickles in process.

Cauliflower pickles in process.

The big logistical downside to lacto-fermented pickles is that they can’t be canned. The canning process would kill all of those wonderful probiotic bacteria, and render your pickles lifeless. Therefore, you’re stuck with them in the fridge. Being a big batch girl, myself, this is a definite bummer.

In terms of equipment, I’m still a little hazy on how much help the airlock is, given that the lacto fermented pickle recipes I’ve read thus far suggest opening the jar periodically to taste the pickles. Doesn’t this (along with all the air/bad bacteria in there to start with) negate the protective effects of the airlock?

If the airlock is indeed optional, one could just as easily pickle in a simple canning jar and lid and save the cost of the pickler getup. My fabulous gardening friend Tanya makes the best sour kraut I’ve ever tasted with just a regular canning jar.

The recipe I (very loosely) used directed me to let my cauliflower and brine sit in the jar for four days before adding apple cider vinegar and retiring the whole kit and caboodle to the refrigerator.

On day four, I dutifully opened the jar and tasted the pickled cauliflower. Delicious! But so lightly flavored, that I doubted it had really done its thing yet. After all, our house is consistently five to ten degrees colder than the ambient temperature assumed by the recipe (it suggested a household that does not drop below 70 degrees Fahrenheit).

I conferred with my better half, and we decided to let the pickles continue their science experiment for another day on the kitchen counter. I now think I should have checked the pickles again that evening, or at least by the following morning. Instead, I waited a good 30 hours. By this point, the fermentation had kicked into high gear, and the ‘Snow Crown’ cauliflower florets bobbed in a mysteriously purple bath of frothy brine.

I’m not sure how to describe the smell and taste, beyond ‘gassy.’ Kelly declared it still good, while I felt vaguely nauseous for the next half hour. It’s really not bad, I guess. For a first try. Maybe. There’s a gallon of it waiting for me in the fridge.

Kelly insists that the taste I found so off-putting is the result of a rather vigorous (but healthy!) fermentation/pickling. Maybe it will mellow with the addition of cider vinegar that the recipe called for? If not, there’s more cauliflower in the garden, as well as some monster cabbages on the way.

Ancestral pickles

By cookie-craving chance yesterday, I dug up a cookbook written in the 1970s by my grandmother’s younger sister Clara B. Clauson. And lo, tucked away in a chapter I’d never bothered to read, I found my great grandfather’s sour kraut recipe, and my great-great grandmother’s pickled green tomatoes recipe. Both call for crocks, with no mention of airlocks or looming threat of bad bacteria. People used to just deal, I guess.

While admittedly vague in spots (a ‘handful’ of salt for each head of cabbage), I’m excited to give these family recipes a spin as soon as I can get my hands on cabbages and green tomatoes.

In the tradition of my ancestors, here’s the approximate recipe for my pickled cauliflower (and really, it would have been undeniably delicious if I’d just stopped a day sooner!):

Cauliflower pickle ingredients (to be fudged and adjusted at your discretion!)

  • 1 large head cauliflower, cut into small florets
  • 1 bunch of cilantro, chopped finely
  • 1 bunch of parsley, chopped finely
  • 1 dried red pepper (sweet and spicy)
  • 1 yellow onion, chopped small
  • 4 cloves garlic, chopped finely
  • 1 bunch mustard greens, chopped finely

Brine

Enough brine to cover the vegetables at a ratio of 2 cups water to 2 tablespoons sea salt

Additional ingredients

  •  ¼ cup cider vinegar (to be added after the main fermentation)

Directions:

Pack the vegetables in a gallon jar, cover with brine, and screw on the lid. Especially if you’re trying a canning lid, don’t screw it on tight. If you do, the jar may explode. My Perfect Pickler also came with a small ceramic cup that is supposed to float just below the screw-on lid. Again, I’m not yet sure how critical its function actually is.

Leave the jar on your counter out of direct light and away from any heat sources for exactly four days. As long as your house is below 74 degrees Fahrenheit, this should be fine (higher temperatures can cause mold to form).

If the pickles don’t seem pickle-y enough, let them sit out longer on the counter, but proceed with extreme caution and frequent taste tests.

When you judge the pickles to be done, add the cider vinegar and transfer pickles to the fridge. They should last for months, though they will continue to ferment slowly in the refrigerator.